
That ear-splitting squeal you hear every time you tap the brake pedal isn’t just an annoyance—it’s your car’s way of sending up a flare. Before you can silence the noise, you need to play detective and figure out what’s causing it. That sound is a signal, and it can mean anything from “no big deal” to “get to a shop, now!”
We’re going to walk through the most common reasons your brakes are screaming at you. Think of this as your diagnostic starting point, helping you tell the difference between a harmless squeak from morning dew and a grinding shriek that points to a serious problem.
Why Are My Brakes Squeaking?
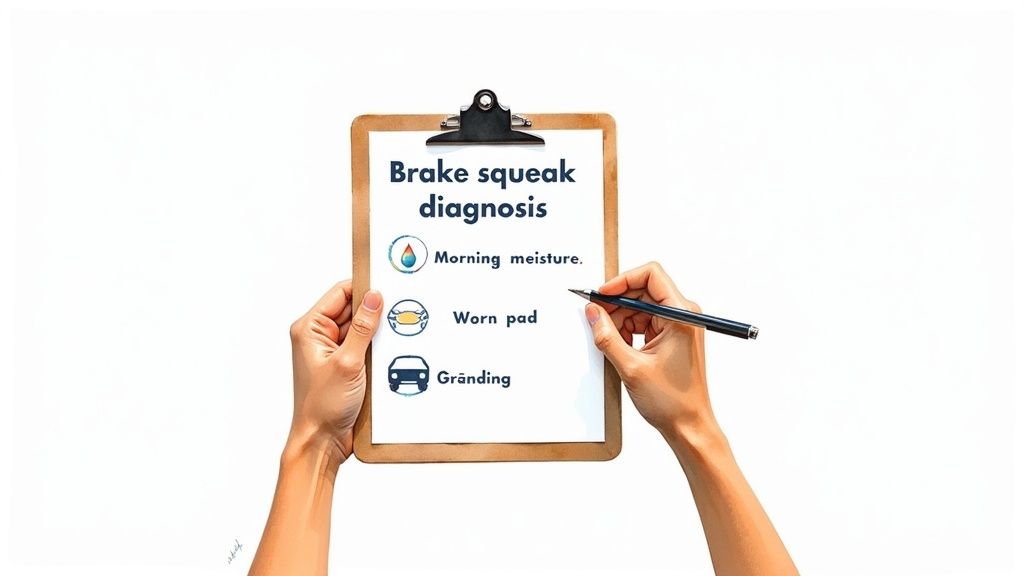
Let’s get one thing straight: not all squeaks are a five-alarm fire. Some are temporary and completely normal, while others are a clear sign you need to take action.
To help you quickly pinpoint the issue, here’s a quick-reference chart. Just match the sound you’re hearing to the likely cause.
Brake Noise Diagnostic Chart
| Type of Noise | Likely Cause | When It Happens | Recommended Action |
|---|---|---|---|
| Light, high-pitched squeak | Morning moisture/surface rust | Only for the first few stops | Usually resolves on its own. |
| Consistent, sharp squeal | Worn brake pads | Every time you brake | Replace brake pads immediately. |
| Grinding or scraping | Metal-on-metal contact | During braking or constantly | Stop driving! Severe wear; needs urgent repair. |
| Squeaking without braking | Lack of lubrication/stuck caliper | While driving, stops when you brake | Inspect and lubricate brake components. |
| Loud squeak after heavy use | Glazed rotors/pads | After hard braking (e.g., down a hill) | May need resurfacing or pad replacement. |
This chart should give you a solid idea of what you’re up against. Remember, any persistent or unusual noise is worth investigating further.
Common Causes of Brake Squeaks
Let’s dig a little deeper into the usual suspects behind that racket.
- Morning Moisture and Debris: Ever notice a slight squeak first thing in the morning, especially when it’s damp outside? A thin layer of rust and moisture can build up on the brake rotors overnight. This is perfectly normal and typically vanishes after your first few stops burn it off.
- Brake Pad Wear Indicators: This is the most common “important” squeal. Most brake pads are designed with a tiny metal tab called a wear indicator. When your pads are nearly worn out, this tab scrapes against the rotor, creating a high-pitched, impossible-to-ignore squeal. It’s an intentional warning system telling you it’s time for new pads.
- Glazed Rotors: If you’ve been doing a lot of heavy braking—think city driving or mountain descents—your pads and rotors can get incredibly hot. This intense heat can create a smooth, glass-like surface, or “glaze,” which severely reduces stopping power and often causes a loud squeal.
- Lack of Lubrication: Your brake system has several moving parts and metal-to-metal contact points that need a special high-temperature grease. When that lubricant wears away, the resulting vibration between the pads, caliper, and bracket can create a persistent squeak.
Key Takeaway: If you hear a consistent squeal every single time you hit the brakes, it’s almost certainly the wear indicators. Don’t put it off—ignoring it can wreck your rotors and turn a simple pad swap into a much pricier repair.
Understanding these sounds is your first and most important step. If you want to explore other potential issues, our guide on common brake problem symptoms provides even more detail.
A Look Inside Your Brake System
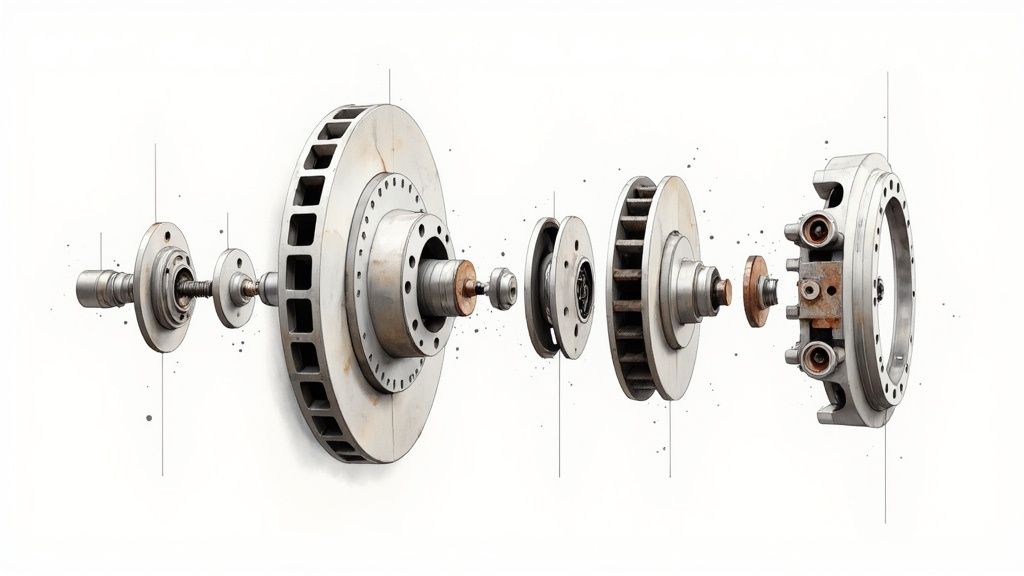
Before you can get to the bottom of that annoying squeal, you’ve got to know what you’re looking at. Most cars today, especially on the front wheels, have a disc brake system. It’s a beautifully simple setup when you break it down, really just a few key parts working together.
Think of it this way: you have the rotor, which is the big metal disc that spins along with your wheel. Clamped over the top of it is the caliper. Tucked inside that caliper are the brake pads—these are the pieces that do the heavy lifting.
When you hit the brakes, hydraulic pressure makes the caliper squeeze the pads against the spinning rotor. That friction is what brings your car to a stop. That awful squealing? It’s almost always a high-frequency vibration happening somewhere between those three parts.
The Main Players in Your Brakes
- Brake Rotor: This is the large disc. When its surface gets warped or develops a slick, mirror-like finish (known as glazing), you’re bound to hear some noise.
- Brake Caliper: The hydraulic clamp that holds everything together. It has slide pins that need to move freely. If they get gummed up or rusted, the caliper can’t apply even pressure, leading to weird pad wear and, you guessed it, squeaking.
- Brake Pads: These are the workhorses. The material they’re made from and how worn they are is the number one cause of brake squeal.
It’s worth noting that brake systems are always evolving. Take the regenerative braking in EVs, for instance. The electric motor does a lot of the slowing, so the regular friction brakes don’t get used as much. This can lead to its own unique set of noise problems when they finally do kick in.
While disc brakes are the standard, you might find drum brakes on the rear wheels of some cars. If you’re curious about the nitty-gritty, you can explore the different types of car brakes in our other guide. Getting this basic layout down is the first real step to getting your quiet ride back.
Your Essential DIY Brake Repair Toolkit
Before you even think about touching a lug nut, let’s talk about your gear. Trust me, trying to tackle any car repair without the right equipment is a one-way ticket to a frustrating afternoon. Fixing squeaky brakes isn’t complicated, but having the right tools on hand from the start is what separates a smooth job from a total headache.
First things first: safety. I can’t stress this enough. Never, ever get under a car that’s only held up by a jack. That’s how accidents happen. You absolutely need a solid pair of jack stands to bear the vehicle’s weight. A good hydraulic jack will make lifting the car a breeze, and a simple lug wrench is a must for getting the wheels off.
Tools and Supplies for the Job
Alright, with the car safely up on stands, it’s time to get to the brakes themselves. You’ll need a decent socket set and a ratchet to get the caliper bolts off—they’re usually on there pretty tight. You’ll also need either a large C-clamp or a specific brake caliper tool. This is for pushing the caliper piston back in so you have room to fit the new pads.
As for the stuff that actually stops the squeak, you’ll want to have these items within arm’s reach:
- Brake Cleaner: This stuff is magic in a can. A good spray will dissolve all that built-up brake dust and road gunk without leaving any greasy film behind.
- High-Temperature Brake Grease: This is your secret weapon against vibration, which is the root cause of most brake noise. A little dab on the back of the pads and on the caliper slide pins makes all the difference.
- Shop Towels: You’re going to need more than you think. They’re essential for cleaning parts and, inevitably, your hands.
A little prep work here goes a long way. Getting all your tools and supplies lined up before you start means you won’t have to make that greasy, mid-job dash to the auto parts store. It makes the whole process faster, safer, and a lot less stressful.
Cleaning and Greasing Your Brakes for a Quieter Ride
Alright, let’s get our hands dirty. You’d be surprised how often the fix for squeaky brakes isn’t a wallet-draining replacement, but just a really good cleaning and a bit of carefully applied grease. That annoying squeal is usually just high-frequency vibrations caused by brake dust, road grime, and rust buildup.
First things first: get your vehicle safely jacked up and secured on jack stands, then pop the wheel off. This gives you a clear shot at the brake assembly. Your best friend for this part of the job is a can of brake cleaner. Don’t be shy with it—spray down the entire caliper, rotor, and pads to blast away all that caked-on black dust.
This infographic gives you a quick rundown of the gear you’ll want to have on hand before you start.
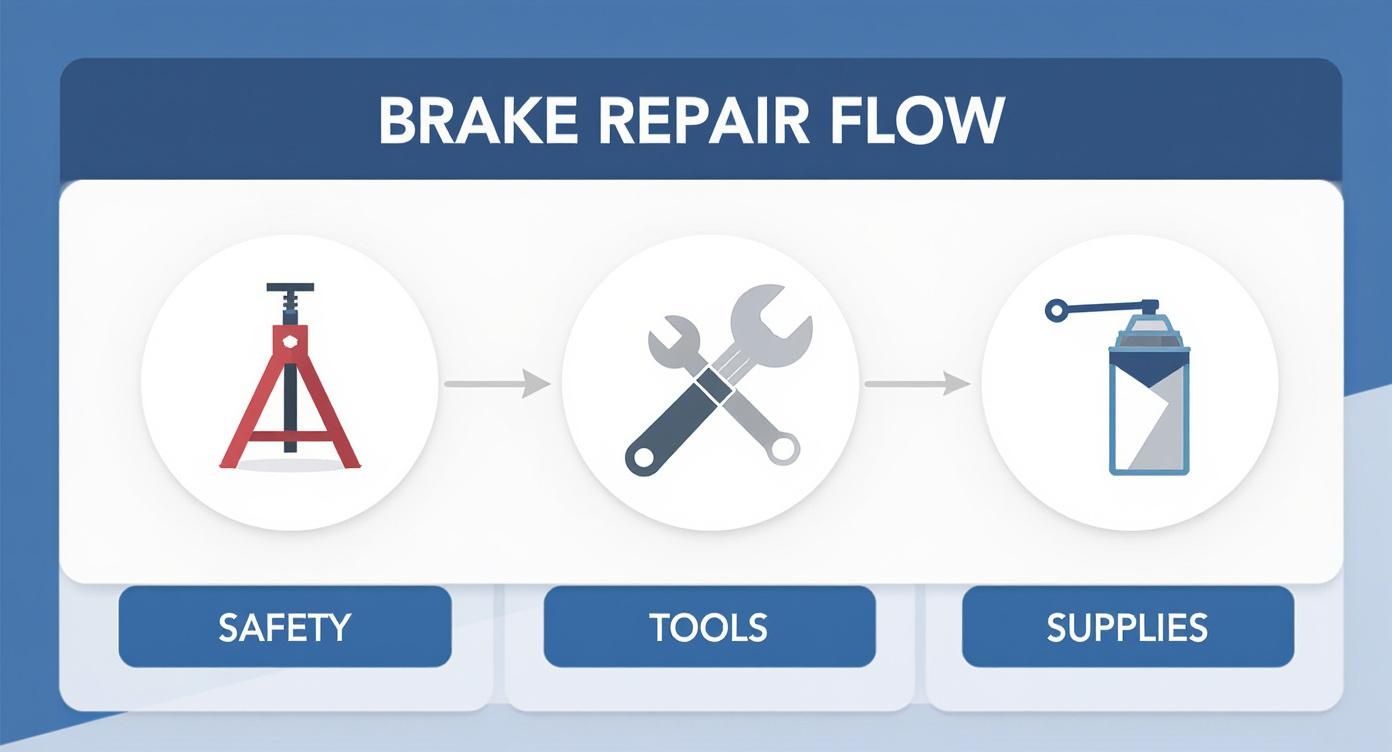
Having your safety gear, tools, and supplies organized ahead of time makes the whole process smoother and safer.
Hitting the Right Lube Points
Once everything is clean and dry, it’s time for lubrication. This is a precision task, not a “spray it everywhere” job. We’re using a small amount of high-temperature brake grease on specific metal-on-metal contact points.
Here’s exactly where to apply it:
- Back of the brake pads: A thin, even coat on the metal backing plate is all you need. This is where the caliper piston and the outer caliper “fingers” make contact.
- Caliper slide pins: These pins are crucial for allowing the caliper to move smoothly. Pull them out, wipe them clean, and apply a fresh coat of grease before putting them back.
- Pad hardware clips: The little metal clips the brake pads ride in need a light touch of grease right where the pad’s “ears” slide back and forth.
Crucial Tip: Never, ever get grease or any lubricant on the face of the brake rotor or the friction material of the brake pad. If you contaminate these surfaces, you’ll seriously compromise your ability to stop, creating a major safety risk.
Why This Isn’t a Step to Skip
Proper cleaning and lubrication are at the heart of good brake maintenance. In fact, brake noise is one of the top reasons people bring their cars into the shop. This kind of service is a huge piece of the global vehicle periodic maintenance market, which was valued at around $936.33 billion in 2024.
When you clean off the gunk and re-lube these key spots, you’re damping the vibrations that cause the squeal. You’re also ensuring the pads can move freely and apply even pressure to the rotor. For many noisy brake issues, spending an hour on this simple service is all it takes to bring back that quiet, confident stop.
Time to Check the Pads and Rotors
So, you’ve cleaned and lubricated everything, but that awful squeal is still there. This is a classic sign that your brake components are simply worn out. That high-pitched noise isn’t just annoying; it’s often a built-in safety feature—your car’s way of screaming for attention.
When brake pads get too thin, a small metal tab called a wear indicator makes contact with the rotor, creating that signature squeal. It’s a clear signal that the friction material is gone and it’s time for a replacement. Learning to spot these signs is the key to fixing squeaky brakes for good.
The condition of your brake pads is almost always the prime suspect. It’s no surprise, given how often they’re replaced; the aftermarket segment for brake pads accounted for a massive 62.4% of sales in 2024. You can see more on the automotive brake pad market on Market.us.
How to Check Your Brake Pads
Your first move should be to inspect the brake pads themselves. You’re specifically looking at the thickness of the friction material pressed against the rotor.
- Try the Penny Test: This is an old-school trick that still works. Stick a penny into the gap between the caliper and rotor, with Lincoln’s head pointing down. If you can see the top of his head, your pads are getting dangerously thin.
- Find the Wear Indicator: Most pads have a small metal tab attached to the backing plate. If this tab is right up against the rotor, or even touching it, you’ve found the source of the squeal. It’s a non-negotiable sign that you need new pads.
As a rule of thumb, brake pad friction material should be at least 1/4 inch thick (about 6.4mm). Once it gets thinner than that, you’re on borrowed time.
How to Inspect the Brake Rotors
Next, turn your attention to the brake rotors. Make absolutely sure they are cool to the touch before you begin. Run your fingers lightly across the surface; it should feel almost perfectly smooth.
Keep an eye out for these tell-tale signs of trouble:
- Deep Grooves: If you can feel noticeable ridges or scoring, the rotor surface is too uneven to work properly. This is a common cause of squealing and vibration.
- Glazing: Does the rotor have a slick, mirror-like finish? That’s called glazing, and it happens when the rotor gets overheated. A glazed surface is too hard to create proper friction, leading to noise and poor braking.
- Discoloration: Any bluish or purplish tints on the metal are another dead giveaway of overheating.
Knowing these visual cues is incredibly important. For a closer look at the components, take a look at our guide on brake pads. If you see any of these issues on your rotors, no amount of cleaning or grease will help—it’s time for new parts.
Still Have Questions About Brake Noise?
Finishing up a brake job and still hearing a little noise can be frustrating, but it’s not always a cause for panic. Let’s walk through a few common questions I hear all the time. Knowing what’s normal and what’s a warning sign will give you peace of mind on the road.
Is It Actually Safe to Drive with Squeaky Brakes?
That’s the million-dollar question, and the answer is… it depends. A light, faint squeak when you first pull out on a dewy morning is usually just surface rust on the rotors burning off. No big deal—it should go away after a couple of stops.
But a constant, high-pitched squeal every time you touch the pedal? That’s your car’s built-in wear indicator telling you the brake pads are getting dangerously thin. You need to get that checked out soon.
The sound you absolutely cannot ignore is a harsh, metallic grinding. That’s a tell-tale sign of metal-on-metal contact, which means you’re wrecking your rotors and calipers. If you hear that, pull over as soon as it’s safe and get your car towed.
I Just Replaced My Brakes, So Why Are They Squeaking?
I know, it’s maddening. You just spent the time and money on new brakes, and they’re still making noise. More often than not, this is perfectly normal.
New pads and rotors need to go through a “bedding-in” process. Think of it as breaking them in. The two surfaces have to wear into each other to create a perfect, even contact patch. This can cause some light squeaking for the first couple hundred miles.
If the sound is loud, sharp, or just won’t quit, something else might be up:
- A simple installation mistake: Maybe a clip isn’t seated right or a caliper bolt isn’t torqued to spec.
- Missed lubrication: Those little contact points on the caliper bracket and pad ears need a dab of high-temp grease.
- The pads themselves: High-performance and semi-metallic pads have a more aggressive compound. A little noise is often the price you pay for extra stopping power.
What’s the Damage? How Much to Fix Squeaky Brakes?
The cost is all over the map because it depends entirely on the cause. If all your brakes need is a good cleaning and some fresh lubricant on the contact points, you’re likely looking at an hour of shop labor, which usually runs between $80 and $150.
When you start needing new parts, the price goes up. A standard brake pad replacement will typically cost between $150 and $300 per axle. If you’ve let it go too long and need new rotors, too, you can expect that bill to jump to $400 to $700 or more per axle, especially for larger trucks or European cars.
Don’t want to get your hands dirty? The certified technicians at Express Lube and Car Care are here to help. Schedule your brake inspection today for a quiet, confident ride. Visit us online at https://www.expresslubearlington.com.