
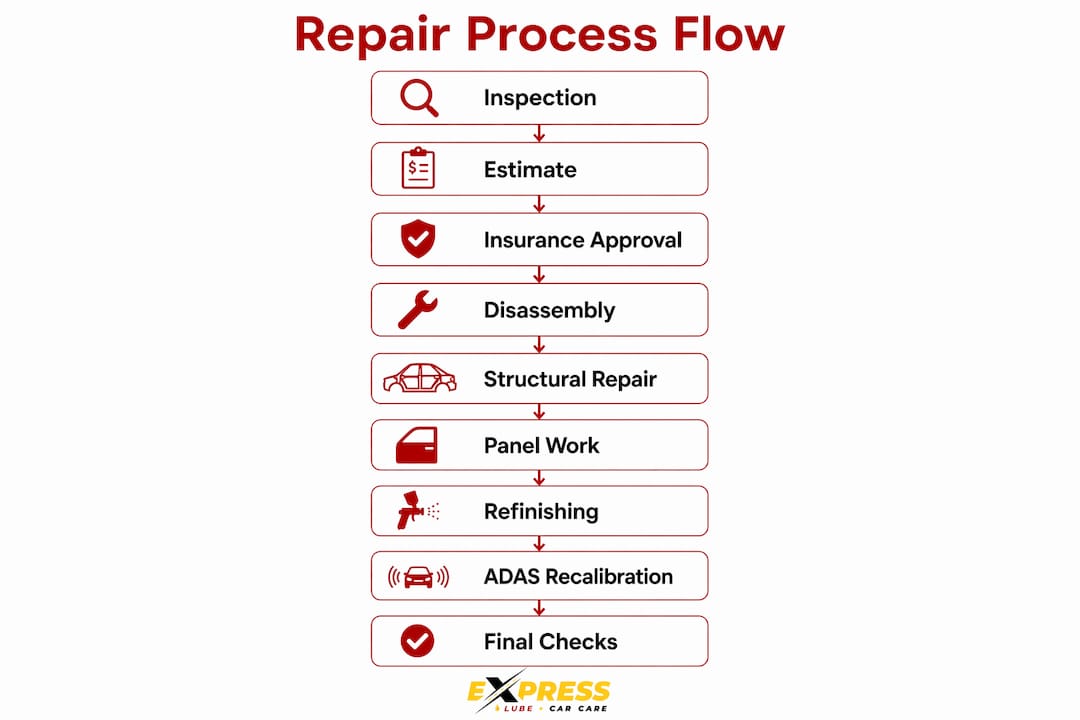
The accident repair process is the structured sequence of steps that restores your vehicle to factory safety standards after a collision, covering structural, mechanical, cosmetic, and electronic systems. Most car owners walk into a shop with no idea what actually happens behind those bay doors, and that gap in knowledge costs them time, money, and peace of mind. Understanding the accident repair workflow puts you in control. You know what questions to ask, when to push back on timelines, and how to spot a shop that cuts corners. This guide walks you through every phase, from the first inspection to the final test drive, so nothing catches you off guard.
How the accident repair process works from the first inspection
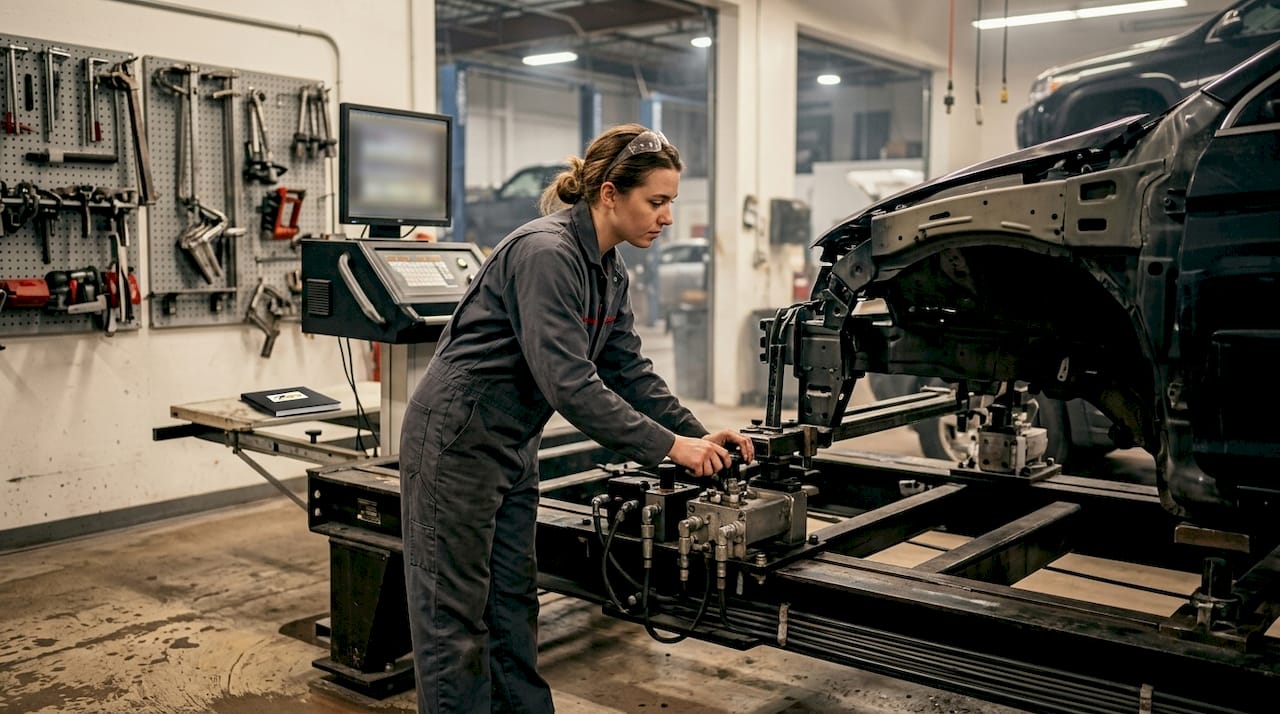
The repair process starts with a visual inspection and electronic scanning to document damage and define the full repair scope before any major work begins. Think of this as the shop playing detective. A technician walks around your vehicle, photographs every point of impact, and notes what is visibly bent, cracked, or misaligned. That part is straightforward. What surprises most car owners is the electronic side of this step.
Modern vehicles carry dozens of sensors, modules, and safety systems that can be disrupted by a collision without showing a single scratch. A diagnostic scanner connects to your car’s OBD port and pulls fault codes from systems like airbag controllers, stability control, and ADAS sensors. This electronic snapshot matters because it shapes the repair scope and supports your insurance claim with hard data.
Here is what a thorough initial assessment covers:
- Visual damage check: Body panels, glass, bumper structures, wheel wells, and undercarriage
- Electronic system scan: Fault codes from airbag, ABS, ADAS, and powertrain modules
- Structural alignment check: Preliminary measurements to flag potential frame distortion
- Fluid and mechanical inspection: Leaks, suspension damage, and drivetrain concerns
- Photo documentation: Time-stamped images for the insurance file and repair authorization
Pro Tip: Ask the shop for a copy of the pre-repair diagnostic scan report. This document protects you if any safety system issues surface after you pick up the vehicle.
You can also use a car inspection checklist to understand what a thorough vehicle assessment should cover before you hand over your keys.
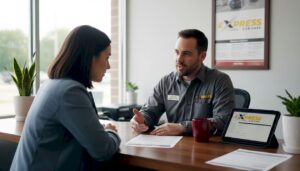
How insurance approval shapes your repair timeline
Insurance approval is required before teardown and structural repair phases begin. This is the step that trips up most car owners because it feels like waiting in line when you just want your car fixed. Here is what actually happens during that window.
The shop prepares a written estimate based on the initial inspection and submits it to your insurer. The insurer reviews it, may send an adjuster, and either approves, disputes, or partially approves the scope. No reputable shop starts cutting, pulling, or painting until that authorization is in writing. Skipping this step creates billing disputes that delay your vehicle for weeks.
The authorization process typically follows this sequence:
- Written estimate prepared by the shop using estimating software like CCC ONE or Mitchell
- Estimate submitted to insurer along with photo documentation and diagnostic reports
- Insurer review by a desk adjuster or on-site appraiser
- Repair authorization issued in writing, covering approved parts, labor, and procedures
- Customer notified of the approved scope and any out-of-pocket costs before work starts
Understanding how repair estimates work in Texas shops gives you a real advantage when reviewing what your insurer approves versus what the shop recommends.
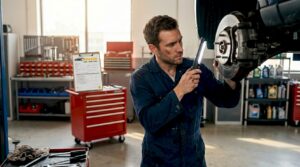
Why disassembly reveals damage you cannot see from the outside
Shops frequently discover 20 to 40% more damage after teardown than what was visible during the initial inspection. That number sounds alarming, but it is actually the system working correctly. A bumper cover hides the foam absorber, the reinforcement bar, and the mounting brackets behind it. A door skin hides the intrusion beam, the window regulator, and the wiring harness inside it. You simply cannot see those components without taking things apart.
This phase is called disassembly or teardown, and it is where the real picture of your vehicle’s condition emerges. Technicians remove panels, trim pieces, and components to expose the underlying structure. Frame rails, mounting points, and subframe connections get measured against OEM specifications using electronic measuring systems. Hidden mechanical damage like bent control arms or shifted engine mounts also surfaces here.
| What is visible before teardown | What teardown reveals |
|---|---|
| Bent bumper cover | Crushed foam absorber and bent reinforcement bar |
| Dented door skin | Damaged intrusion beam and broken window regulator |
| Cracked headlight housing | Shifted headlight bracket and torn wiring harness |
| Scuffed quarter panel | Kinked inner structure and compromised seam welds |
When hidden damage is found, the shop submits a supplement request to your insurer. Organized photo and measurement documentation speeds insurer approval and keeps the repair timeline on track. You will also be contacted for authorization before any additional work proceeds. This is your right as the vehicle owner, and a trustworthy shop will never skip that conversation.
Pro Tip: When the shop calls about a supplement, ask for the photos and measurements they are sending to the insurer. Seeing the evidence yourself makes the approval decision much easier.
What structural repair, panel work, and refinishing actually involve
Structural repair uses electronic measuring systems and frame machines to restore your vehicle’s frame geometry to OEM factory specifications. This is not guesswork. A technician anchors your vehicle to a jig system, attaches hydraulic pulling equipment to the distorted sections, and applies controlled force while monitoring live measurements. The goal is precise restoration, not approximate straightening. Even a few millimeters of deviation from OEM geometry affects how your vehicle handles, how doors align, and how safety systems perform in a future collision.
Panel repair follows structural work. Depending on the severity of the damage, a technician either straightens the existing panel using body hammers and dollies or replaces it entirely. The choice between OEM (original equipment manufacturer) parts and aftermarket alternatives matters more than most people realize.
| Part type | Fit and finish | Warranty | Impact on resale |
|---|---|---|---|
| OEM parts | Exact factory fit | Manufacturer warranty | Preserves vehicle value |
| Aftermarket parts | Variable fit, may require adjustment | Limited or none | May reduce resale value |
| Recycled OEM parts | Factory fit, pre-owned condition | Shop warranty only | Neutral to slight reduction |
OEM repair procedures provide VIN-specific instructions covering weld methods, torque specs, and calibration steps, forming the authoritative checklist for safe collision repairs. A shop that follows these procedures is not just doing good work. It is protecting your safety and your vehicle’s value.
The refinishing phase covers the following steps:
- Surface preparation: Sanding, feathering edges, and cleaning the repair area
- Priming: Applying primer to seal the surface and build a base for color
- Color matching: Using computer-aided spectrophotometers to match your vehicle’s exact paint code and age-related fade
- Base coat application: Spraying color in a controlled paint booth environment
- Clear coat application: Sealing the color layer for gloss and UV protection
- Curing: Baking the finish under controlled heat to harden the clear coat
- Corrosion protection: Applying sealants and undercoating to restored structural areas
Paint booths and multi-step processes produce the corrosion protection and seamless finish that a parking lot spray job simply cannot replicate.
How ADAS recalibration, mechanical repairs, and final checks complete the process
ADAS recalibration is increasingly mandatory for modern vehicles after collision repairs, and skipping it is a genuine safety risk. ADAS stands for Advanced Driver Assistance Systems, which includes features like automatic emergency braking, lane-keep assist, blind-spot monitoring, and adaptive cruise control. These systems rely on cameras, radar units, and ultrasonic sensors mounted throughout your vehicle. Any repair that moves a bumper, windshield, or fender can shift those sensors out of alignment.
Even minimal calibration errors can cause features like lane-keep assist or automatic emergency braking to malfunction. That means a system you rely on for safety could activate at the wrong moment or fail to activate when you need it most. Calibration requires specialized equipment and a controlled environment, which is why not every shop can perform it correctly.
The final phase of the accident repair workflow covers several critical steps:
- Post-repair diagnostic scan: Confirms all fault codes from the initial scan have been cleared and no new codes are present
- Mechanical repairs: Suspension components, steering geometry, and wheel alignment are adjusted to factory specifications
- Reassembly: All trim, panels, and components are reinstalled and checked for proper fit and function
- Quality control inspection: A dedicated inspector checks panel gaps, paint finish, glass seals, and all repaired systems
- Test drive: The vehicle is driven to verify handling, braking, and the behavior of repaired mechanical systems
- Customer walkthrough: The shop reviews completed repairs with you before you sign off and take delivery
Collision repair workflows are complex and fragmented, often requiring a shop to follow two dozen distinct approval and repair steps involving carriers, OEM procedures, and calibration. Knowing this helps you set realistic timeline expectations and ask the right questions at each stage.
Key takeaways
The accident repair process follows a fixed sequence from inspection through delivery, and every phase depends on the one before it to protect your safety and vehicle value.
| Point | Details |
|---|---|
| Start with a full inspection | Visual and electronic scanning defines the repair scope before any work begins. |
| Insurance authorization comes first | No structural or panel work should start without written insurer approval. |
| Teardown reveals hidden damage | Shops find 20 to 40% more damage after disassembly, triggering supplement requests. |
| OEM procedures protect your safety | VIN-specific repair instructions cover welds, torque specs, and calibration requirements. |
| ADAS recalibration is non-negotiable | Post-repair calibration of safety sensors is mandatory for modern vehicles to function correctly. |
What I have learned watching car owners navigate repairs
Here is something most repair guides will not tell you. The supplement phase is where most car owners lose control of the process. They approve the initial estimate, drop off the car, and then feel blindsided when the shop calls three days later with a higher number. That reaction is understandable, but it is also avoidable. Ask the shop upfront how they handle supplement discoveries and what their communication process looks like. A shop that has a clear answer is a shop that has done this before.
The other thing I see car owners get wrong is choosing a shop based on price alone. A lower estimate often means aftermarket parts, skipped calibrations, or procedures that deviate from OEM specs. The professional repair benefits of using a certified shop go well beyond cosmetics. They affect how your vehicle performs in the next collision and whether your insurance claim holds up if you sell the car.
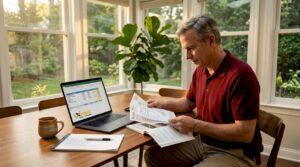
Keep every document from the repair. The initial estimate, the supplement authorizations, the post-repair scan report, and the parts invoices all belong in a folder you hold onto. That paperwork tells the story of what was done to your vehicle and protects you in future insurance claims or resale negotiations. Most car owners toss it. Do not be most car owners.
Managing timeline expectations is also worth addressing directly. A thorough repair on a vehicle with moderate structural damage and ADAS components can take two to four weeks. Shops that promise faster turnarounds on complex jobs are usually cutting something out of the process. Patience here is not passive. It is how you get a safe vehicle back instead of a fast one.
— Hassan
Get reliable repair and maintenance support at Expresslubearlington
Dealing with accident repairs is stressful enough without wondering whether your shop is doing the job right. At Expresslubearlington, our ASE-certified technicians handle everything from post-accident diagnostics and electrical system repairs to mechanical corrections and routine maintenance that keeps your vehicle running safely after the body shop work is done. We are a RepairPal Certified Shop and a CarFax Top-Rated Service Center, which means our workmanship and transparency have been independently verified. If you are navigating a repair and want a second opinion on the mechanical side, or if you need to understand what your repair estimate covers before you sign off, we are here to help. Drivers across the DFW area trust us because we give straight answers and do the work correctly the first time. Stop by and let us take a look.
FAQ
What are the main steps in the accident repair process?
The accident repair process follows this sequence: intake and inspection, written estimate, insurance authorization, disassembly, structural and panel repair, paint refinishing, reassembly, ADAS recalibration, quality inspection, and delivery. Each step must be completed before the next begins to meet safety and OEM standards.
Why does my repair estimate change after the shop tears down my car?
Shops discover 20 to 40% more damage after disassembly than what is visible during the initial inspection. Hidden components like reinforcement bars, wiring harnesses, and frame mounting points only become accessible once panels are removed, which triggers a supplement request to your insurer.
Is ADAS recalibration really necessary after a collision repair?
Yes. Any repair that moves a bumper, windshield, or fender can shift the cameras and radar sensors that power your safety systems. Even small calibration errors can cause automatic braking or lane-keep assist to malfunction, making post-repair recalibration a safety requirement, not an optional add-on.
How long does the accident repair process typically take?
A minor repair with no structural damage can take three to five business days. A vehicle with frame damage, hidden component replacement, and ADAS recalibration typically takes two to four weeks. Supplement approvals and parts availability are the most common causes of delays.
Should I choose OEM or aftermarket parts for my repair?
OEM parts are manufactured to your vehicle’s exact specifications and preserve resale value. Aftermarket parts vary in fit and quality and typically carry limited warranties. For structural components and safety-related parts, OEM is the standard that reputable shops follow when using proper repair procedures.