
Yes, you can spot an obvious car A/C leak yourself with soapy water on visible fittings, a look for oily residue or a listen for hissing near hoses. UV dye kits can confirm what your eyes miss. But pinpointing small, hidden, or evaporator leaks requires professional tools like electronic sniffers and nitrogen pressure tests, and any refrigerant handling legally requires an EPA-certified technician.
TL;DR:
- Most common leak points include rubber O-rings, hose fittings, the condenser, and the compressor shaft seal, with evaporator leaks being rarer but more complex to repair.
- DIY tests such as soapy water and UV dye are useful for detecting obvious leaks but often miss small or hidden ones that require professional pressure testing or electronic sniffers.
- Repair costs vary widely based on the part failed and labor involved, typically ranging from $100 to over $300 for diagnostics, with higher expenses for condenser or evaporator replacements.
- Handling refrigerant yourself is illegal and risky, requiring EPA certification due to environmental, safety, and mechanical risks associated with improper recovery and repair.
- Proper leak diagnosis involves thorough evacuation, pressure testing, and exact-weight recharge, with most repairs being completed in a single day by certified technicians.
Table of Contents
- Signs Your Car AC Is Leaking and Where to Look First
- How to Test for a Car AC Refrigerant Leak Yourself
- How Do Shops Find Leaks That DIY Methods Miss?
- Why Refrigerant Handling Isn’t a DIY Job
- What Does a Leak Diagnostic and Repair Actually Cost?
- Inside an ASE-Certified Shop’s Leak Diagnostic Process
- What Happens After the Leak Is Found?
- What Most Advice Gets Wrong About AC Leak Detection
- Schedule a Leak Diagnostic or AC Service at Express Lube & Car Care
- Sources
- FAQ
Signs Your Car AC Is Leaking and Where to Look First
A leak rarely announces itself outright. What you’ll usually notice first is your A/C blowing cool instead of cold, then gradually losing power over days or weeks. The compressor might cycle on and off erratically, or you’ll hear a faint hiss near the dash or engine bay when the system is running. Oily film under the hood is another giveaway, since refrigerant oil leaves residue wherever it escapes.
Most leaks trace back to a handful of predictable spots. According to research from Purdue’s International Compressor Engineering Conference, the usual suspects are rubber O-rings and hose connections, condenser damage from road debris, and the compressor shaft seal. Evaporator leaks happen less often, but they’re buried behind the dashboard and far more labor-intensive to reach.
Your first-look checklist should cover:
- O-rings and hose fittings — check for grime buildup, a classic sign refrigerant oil has been seeping out
- The condenser — inspect the front-mounted unit for bent fins, small punctures, or debris damage
- Compressor shaft seal — look for oil flung in a circular pattern near the pulley
- Service ports — feel for a sticky, oily coating around the low and high side caps
- Evaporator core — harder to check without disassembly, but a musty cabin smell can hint at a leak here
How to Test for a Car AC Refrigerant Leak Yourself
You can perform some basic visual and soapy-water tests yourself, but professional tools and certified technicians are needed for precise leak detection and repair.
- Start with a visual sweep. Pop the hood and look at every visible fitting, hose, and the condenser face for oily streaks or crusted grime.
- Run the soapy-water test. Mix dish soap with water, spray it on exposed fittings and hose connections while the A/C runs, and watch for bubbles. A steady stream of tiny bubbles means refrigerant is escaping right there.
- Consider a UV dye kit. These add a fluorescent dye to the system that shows up under a UV flashlight wherever refrigerant has leaked. It’s effective for confirming a leak’s exact location, but it only detects, it doesn’t fix anything, and you’ll still need proper evacuation and recharge afterward.
- Resist the urge to grab a recharge can. DIY recharge kits and stop-leak additives don’t find leaks. They mask symptoms temporarily while moisture contamination and acid formation build inside the system, and sealant compounds can gum up shop equipment during a proper repair later, sometimes triggering extra decontamination charges.
- Know when to stop. Loud hissing, visible oil pooling on the compressor housing, or a system that won’t hold cold air for more than a day or two means it’s time to book a diagnostic instead of chasing the problem further.
Pro Tip: If you spot oil flung in a circular pattern around the compressor pulley, that’s often a shaft-seal leak. It’s one of the easiest DIY clues to catch, and it usually means the compressor itself needs attention, not just a top-off.
How Do Shops Find Leaks That DIY Methods Miss?
Small or hidden leaks need equipment your garage doesn’t have. Technicians typically choose from three professional detection methods, depending on how the symptoms present and how stubborn the leak is.
- Electronic refrigerant sniffers trace airborne refrigerant molecules along hoses, fittings, and the condenser. They’re fast and effective for moderate leaks but can struggle in a windy or contaminated engine bay.
- Vacuum hold tests pull the system down and watch for pressure loss over time, a reliable way to catch slow leaks that soapy water would never reveal.
- Nitrogen pressure testing pumps inert gas into the system at higher pressure than normal operation, which is especially useful for tracking down evaporator leaks buried behind the dash.
- Professional UV dye workflows often combine the dye injection with a short drive cycle, letting the dye circulate fully before a technician inspects under UV light.
Diagnostic fees commonly run in the $100 to $300 range depending on which method the job calls for. Before any of these tests happen, though, a shop has to fully evacuate and recover whatever refrigerant remains, both to protect their recovery equipment and to stay compliant with federal handling rules.
Why Refrigerant Handling Isn’t a DIY Job
This isn’t just a liability disclaimer. Federal law requires anyone handling refrigerant to hold EPA Section 608 certification, and for good reason. Refrigerant released into the atmosphere contributes to ozone depletion, and improper recovery can damage the very equipment used to service your car.
There are mechanical risks too, not just regulatory ones:
- Moisture contamination from an improperly opened system reacts with refrigerant oil to form acids that eat away at internal components.
- Sealant additives polymerize when they meet moisture, clogging expansion valves and condenser tubing with material that’s expensive to flush out.
- Running low on refrigerant forces the compressor to work harder with less lubrication circulating, which speeds up wear and can lead to a full compressor failure far sooner than expected.
None of this means you’re helpless. It just means the fix belongs with someone certified to do it right.
What Does a Leak Diagnostic and Repair Actually Cost?
Repair costs swing widely depending on which part failed and how much labor it takes to reach it. Here’s a realistic breakdown of what you’re likely looking at once a leak is confirmed.
| Repair Type | Typical Cost Range | Why |
|---|---|---|
| Diagnostic fee | $100–$300 | Varies by method (sniffer, UV dye, nitrogen test) |
| O-ring or fitting replacement | Lower end of repair costs | Simple part, quick access |
| Hose or line replacement | Moderate | Depends on hose location and routing |
| Condenser replacement | Moderate to higher | Front-mounted part, moderate labor |
| Compressor shaft seal | Higher | Often requires partial compressor disassembly |
| Evaporator core replacement | Highest | Dashboard removal required for access |
Refrigerant type matters too. Newer vehicles running R-1234yf typically cost more to service than older R-134a systems, since the refrigerant itself is pricier and requires dedicated recovery equipment. Regional labor rates factor in as well; labor pricing varies noticeably by state, so a quote in one part of the country won’t necessarily match another.
Ask any shop for an itemized estimate before work begins, and if the system has been opened up, insist on receiver/drier replacement. That component absorbs moisture, and reusing an old one after a repair defeats the purpose of a proper recharge. If cost is a concern, look into auto repair financing options before deciding to defer the repair.
Inside an ASE-Certified Shop’s Leak Diagnostic Process
Not every shop follows the same rigor, and that gap shows up in comebacks and misdiagnosed leaks. Express Lube & Car Care’s technicians hold ASE certification, and the shop carries recognition as a RepairPal Certified Shop and a CarFax Top-Rated Service Center, credentials that reflect consistent, documented workmanship rather than a one-time inspection pass.
Here’s what a proper diagnostic visit typically looks like:
- Initial performance and pressure check to confirm there’s actually a leak rather than a different cooling problem
- Test method selection based on symptoms, whether that’s a sniffer for a moderate leak or nitrogen pressure testing for something more elusive
- Leak pinpointing using the chosen method, sometimes combining UV dye with a short drive cycle
- Written estimate before any repair work begins, so there are no surprises
- Repair and system evacuation, followed by an exact-weight recharge to factory specification
Pro Tip: Ask whether receiver/drier replacement is included in your estimate whenever the A/C loop gets opened. It’s a small part that prevents a much bigger moisture problem down the road.
Most leak repairs wrap up same-day once parts are on hand, and the team walks you through what was found before any work starts.
What Happens After the Leak Is Found?
Once a technician confirms where refrigerant is escaping, you’ve got a few realistic paths forward, and which one applies depends entirely on what part failed.
For minor issues like a worn O-ring or a loose fitting, the fix is usually straightforward: replace the seal, evacuate the system, and recharge to the correct weight. These repairs tend to be quick, often completed within the same visit.
Condenser damage from a rock strike or road debris usually means full replacement rather than a patch, since the aluminum fins and internal tubing don’t hold up well to spot repairs. A compressor shaft seal leak sometimes signals the compressor itself is wearing out, especially if it’s been running low on refrigerant and lubricant for a while. In that case, expect a conversation about whether a seal replacement alone will hold or whether the compressor needs to come out entirely.
Evaporator leaks are the toughest call. Because the part sits behind the dashboard, labor time drives the cost more than the part itself. Some drivers choose to repair it outright; others weigh that cost against the vehicle’s overall value before deciding.
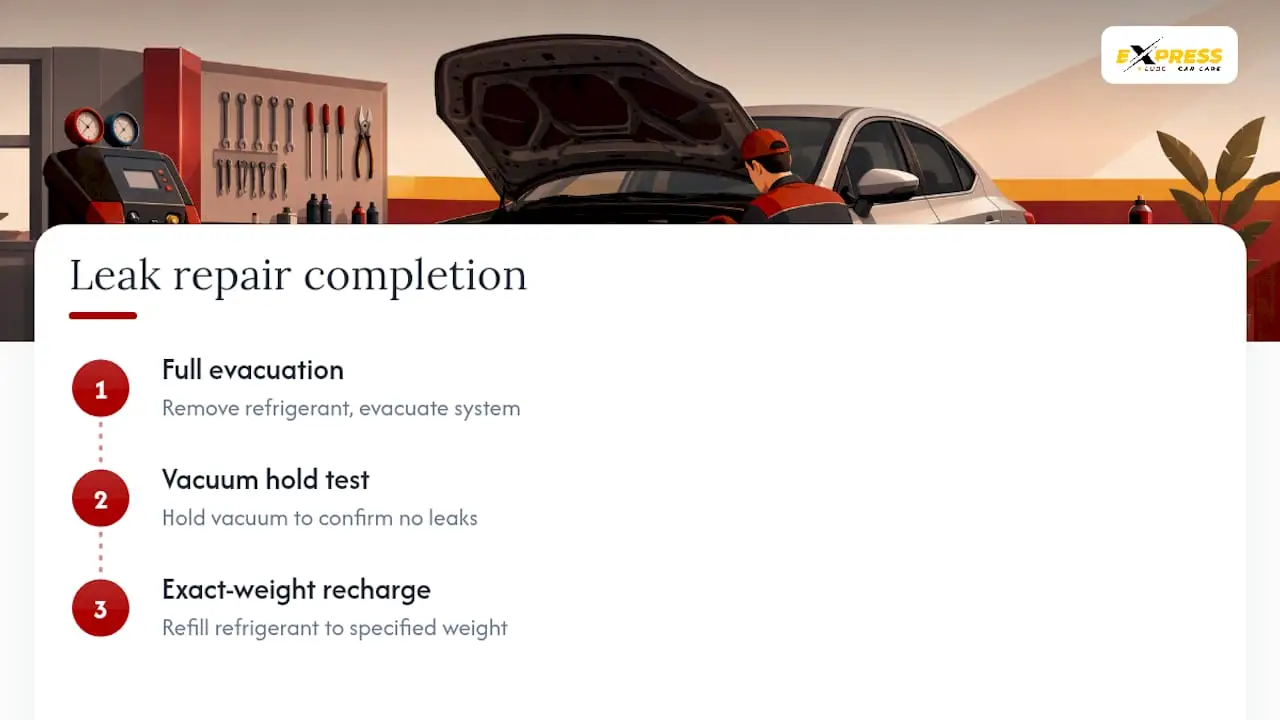
Whatever the repair, the process always ends the same way: full evacuation, a vacuum hold to confirm the system is sealed, and an exact-weight recharge. Skipping that last step, or trusting a shop that doesn’t do it, is how leaks come back within months.
What Most Advice Gets Wrong About AC Leak Detection
Most online guides treat leak detection like a single event: find the leak, fix it, done. That’s not how refrigerant systems actually fail. A leak that’s slow enough to pass a soapy-water test today can still be dumping refrigerant oil onto your compressor bearing every single drive, and by the time cooling performance drops, you’re often looking at compressor wear that a simple seal swap won’t fully address.
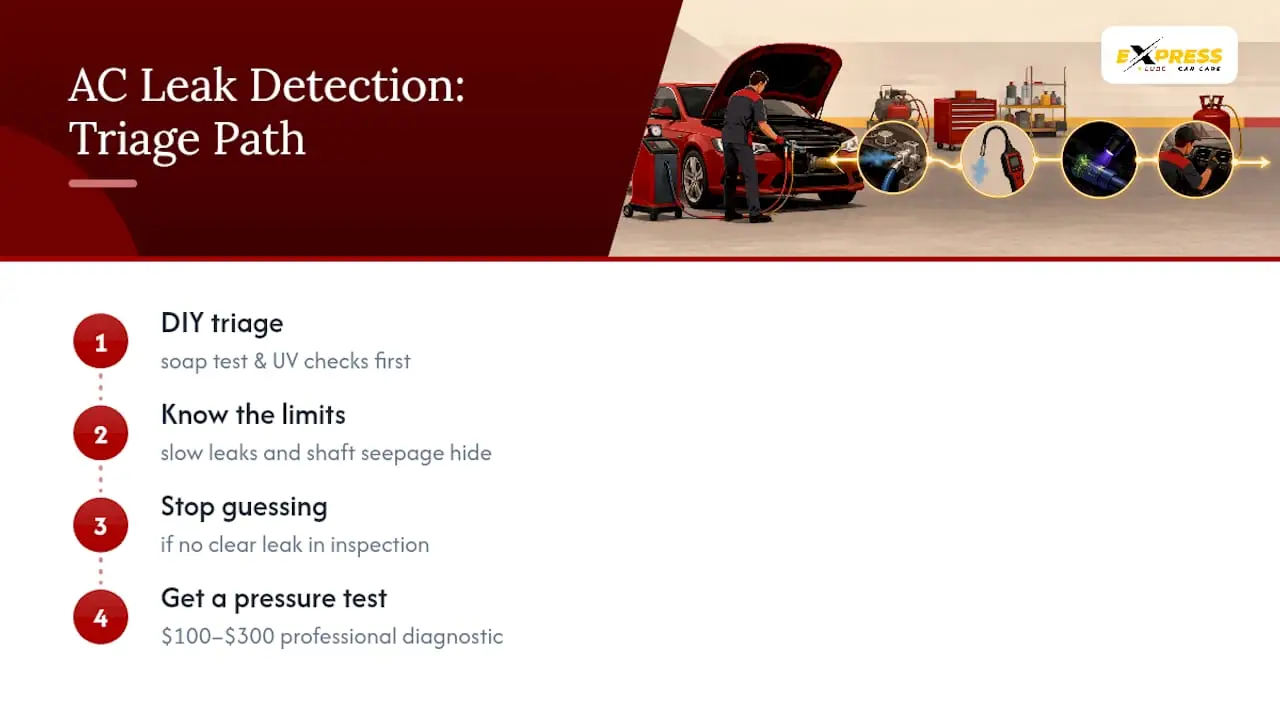
The DIY checks in this guide are genuinely useful, and we’d rather you catch an obvious leak early than ignore a hissing sound for six months. But the conventional wisdom that stops at “spray some soapy water on it” undersells how often the real culprit is hiding somewhere a flashlight can’t reach. Evaporator leaks and slow shaft-seal seepage rarely show themselves without a pressure test or a UV dye cycle.
Our take: treat the DIY stage as triage, not diagnosis. If the soap test or UV light doesn’t clearly show you the leak within a reasonable inspection, stop guessing and get a proper pressure test. The money you save skipping a $100 to $300 diagnostic almost never covers what a misdiagnosed compressor failure costs later.
Schedule a Leak Diagnostic or AC Service at Express Lube & Car Care
If the soapy-water test or a whiff of oily residue has you fairly convinced there’s a leak, the next move is getting it pinpointed properly rather than guessing with a recharge can. Express Lube & Car Care runs full A/C diagnostics using the same professional-grade methods covered above, and our ASE-certified technicians handle the entire process from leak detection through evacuation and exact-weight recharge.

Before you come in, jot down what you’ve noticed: when the cooling loss started, whether you’ve heard hissing, and if you’ve added any refrigerant or sealant products recently. That last detail matters, since contaminated systems sometimes need extra flushing before a repair can proceed. Our A/C repair page has more on what our service includes, and if cost planning is part of your decision, our breakdown of diagnostic fees explains what that charge actually covers. Every repair that involves opening the refrigerant loop gets a full evacuation, vacuum hold, and precise recharge before it leaves our shop. Ready to get the leak found for good? Book your A/C diagnostic with Express Lube & Car Care today.
Sources
- Purdue ICEC — automotive AC leak common locations
- AutoZone — AC repair service and limitations
- EPA 608 certification guide — refrigerant handling requirements
- How much to fix a Freon leak in car — risks of DIY kits and sealants
- Average professional car A/C leak test cost — service breakdown
FAQ
Where Is the Most Common Place for a Car AC Leak?
Rubber O-rings and hose connections fail most often, followed by condenser damage and compressor shaft seal leaks, according to research on automotive A/C systems. Evaporator leaks happen less frequently but take longer to repair since the part sits behind the dashboard.
How Much Does It Cost to Check for an AC Leak in a Car?
Professional diagnostic fees typically range from about $100 to $300, depending on whether the shop uses an electronic sniffer, UV dye, or a nitrogen pressure test. The method chosen depends on how the leak is presenting and how hard it is to locate.
Can AutoZone Check for AC Leaks?
AutoZone offers parts sales and some preliminary pressure checks, but it does not provide comprehensive leak diagnostics or repair services capable of reliably pinpointing where refrigerant is escaping. For an accurate diagnosis, a certified repair shop with electronic detection and pressure-testing equipment is the better route.
How Can I Test for a Car Air Conditioner Leak Myself?
Spray a soap-and-water mix on visible fittings and hoses while the A/C runs, and watch for bubbles forming at the leak point. A UV dye kit can confirm leaks your eyes miss, but locating small, hidden, or evaporator leaks generally requires a professional electronic sniffer or pressure test.
Is It Safe to Use a DIY Recharge Can if I Find a Small Leak?
DIY recharge cans don’t fix a leak, they just delay the symptom while refrigerant continues escaping. Moisture entering an improperly serviced system can cause acid formation and compressor damage, which is why a proper repair always includes evacuation and an exact-weight recharge by a certified technician.