

TL;DR:
- Car battery replacement involves a specific sequence of steps to ensure safety and avoid damage. Proper preparation with the right tools and safety gear is essential before disconnecting the terminals and removing the old battery. Installing the new battery correctly and verifying the connection with proper torque prevents early failure and electrical issues.
Battery replacement steps are the precise sequence of actions required to safely remove an old car battery and install a new one without damaging your vehicle’s electrical system. Get the order wrong and you risk a short circuit, a cracked terminal post, or a car that won’t recognize its own new battery. The good news? This is a 25–40 minute DIY task that any car owner can handle with basic hand tools, the right safety gear, and a clear procedure. Follow this guide and you’ll do it right the first time.
What tools and safety gear do you need first?
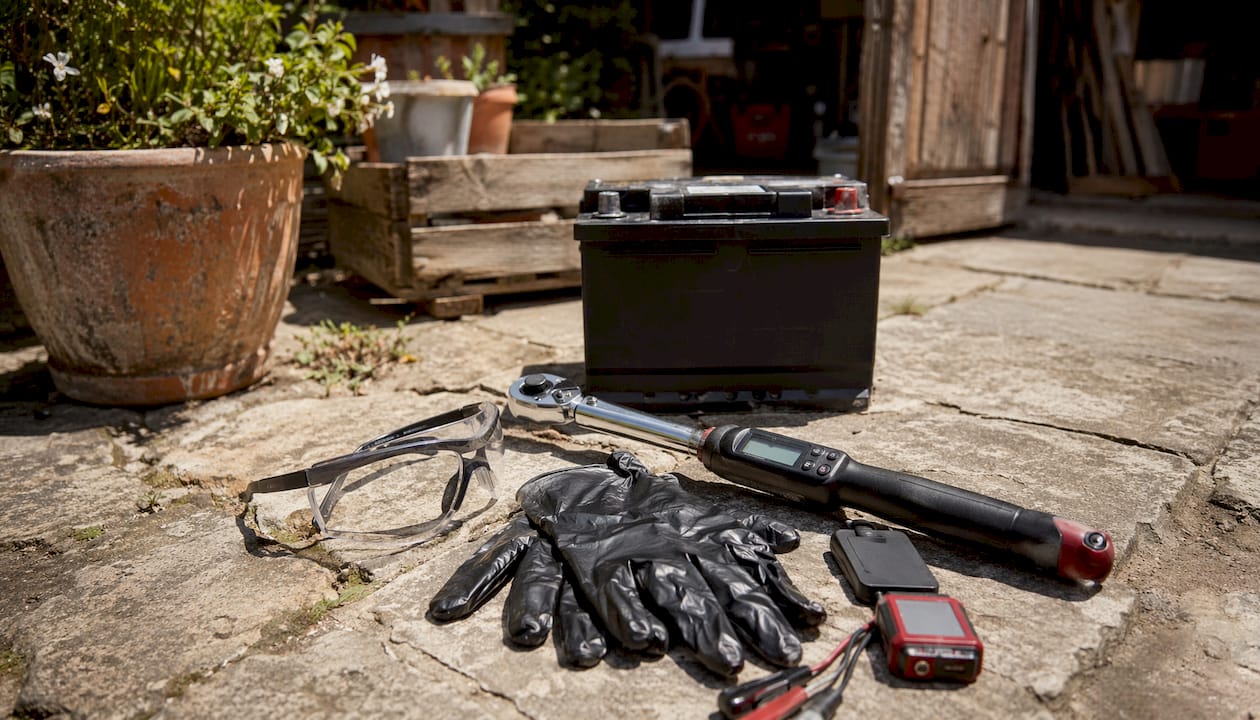
Preparation is the part most car owners skip, and it’s the part that causes the most problems. Before you touch a single bolt, gather everything you need so you’re not hunting for tools mid-job with a loose battery cable dangling near a live terminal.
Essential tools
- Combination wrench set (10mm and 13mm cover most vehicles)
- Torque wrench (for tightening terminal bolts to spec)
- Wire brush or battery terminal cleaner
- Memory saver device (plugs into your OBD-II port to preserve ECU settings)
- Battery terminal anti-corrosion spray or grease
- ANSI Z87.1-rated safety glasses (not regular sunglasses)
- Nitrile gloves (acid-resistant, not latex)
Pre-replacement checklist
| Step | What to do |
|---|---|
| Park safely | Level ground, engine off, key removed |
| Engage parking brake | Prevents vehicle movement during the job |
| Locate the battery | Check under hood, trunk, or under rear seat depending on model |
| Identify terminals | Red = positive (+), Black = negative (−) |
| Connect memory saver | Plug into OBD-II port before disconnecting anything |
Matching your new battery to the correct BCI group size and Cold Cranking Amps (CCA) rating is non-negotiable. Compact cars typically need 450–550 CCA, while trucks often require 700–850+. Many modern vehicles also require AGM batteries specifically. Installing the wrong type causes premature failure and system errors.
Pro Tip: If your vehicle has a stop-start system or a large number of electronics, it almost certainly needs an AGM battery. Check your owner’s manual before buying.
How do you remove the old battery safely?
Removing the old battery is where most DIY mistakes happen. The cardinal rule is simple: always disconnect the negative terminal first. Touching a wrench to the positive terminal while it’s still connected to the car’s chassis is a fast way to create a spark or blow a fuse.
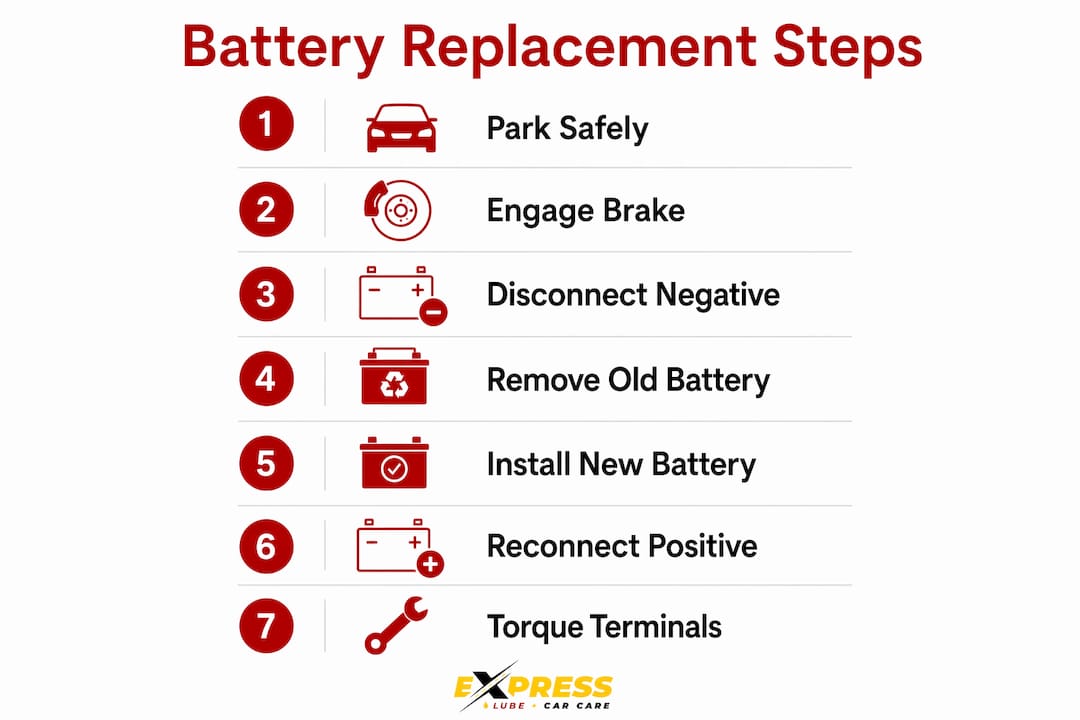
- Loosen the negative terminal clamp first. Use the correct size wrench (usually 10mm or 13mm). Turn counterclockwise. Pull the cable away from the post and tuck it aside so it cannot accidentally touch the terminal.
- Loosen the positive terminal clamp. Same motion, same care. Move the cable clear of the battery.
- Remove the hold-down bracket. This is the metal bar or clamp at the base of the battery. Keep the bolt somewhere safe because you’ll need it for the new battery.
- Lift the battery straight out. Car batteries weigh 35–70 lbs depending on type. Bend your knees, keep your back straight, and grip the battery from the sides using a battery carrier strap if you have one.
- Set the old battery upright on a flat surface. Never tip it sideways. Lead-acid batteries contain sulfuric acid that can spill if tilted.
Pro Tip: Don’t throw your old battery in the trash. The EPA classifies lead-acid batteries as universal waste. Auto parts stores accept them for free recycling and often refund a core charge, which can be $10–$20 back in your pocket.
Once the old battery is out, inspect the battery tray for corrosion or rust. A corroded tray transfers that damage to your new battery. Wipe it down with a baking soda and water solution, then dry it completely before moving on.
How do you install the new battery correctly?
Installation is the reverse of removal, but with a few critical details that make the difference between a battery that lasts five years and one that fails in six months.
- Place the new battery in the tray. Confirm the positive and negative posts align with the correct cables before setting it down. Reversing polarity even briefly can destroy your vehicle’s electronics.
- Reinstall the hold-down bracket. Secure it firmly so the battery cannot shift while driving. Vibration is one of the leading causes of early battery failure.
- Connect the positive terminal first. Slide the clamp over the positive post and tighten. This is the reverse of removal order.
- Connect the negative terminal last. Tighten the clamp securely.
- Torque terminal bolts to 4–6 Nm (35–55 in-lb). This is the step most DIYers skip because they don’t own a torque wrench. Over-torquing cracks soft lead posts and ruins a brand-new battery immediately after installation. Snug is enough. Cranking it down hard is too much.
- Clean the terminals and apply anti-corrosion spray. Terminal corrosion increases electrical resistance and can prevent a new battery from working properly. A quick spray now saves a frustrating diagnostic call later.
Pro Tip: A memory saver connected to the OBD-II port during the swap preserves your ECU’s adaptive values and radio presets. Without it, your car may idle rough for a few days and your radio could lock out entirely, requiring a dealer code to unlock.
Verify the battery group size matches your vehicle’s specification. The group size is stamped on the old battery’s label and listed in your owner’s manual. Installing a physically smaller battery that fits loosely in the tray creates vibration damage within weeks.
What should you do after installation?
Post-installation steps are not optional. They confirm the job worked and protect your investment in the new battery.
- Remove the memory saver after both terminals are secured and tight.
- Start the engine. It should crank immediately. A slow or labored start suggests a connection issue.
- Check the dashboard. The battery warning light should go off within a few seconds. If it stays on, shut the engine off and recheck your terminal connections.
- Drive for at least 20 minutes. A 20-minute drive allows the alternator to fully charge the new battery and register the power state within your vehicle’s battery management system.
- Recheck terminal tightness after the first drive. Vibration can loosen connections that felt tight in the driveway.
Watch for these signs of an incorrect installation: a battery warning light that stays on, a car that cranks slowly despite a new battery, electronics behaving erratically, or a burning smell near the battery tray. Any of these signals mean something went wrong during installation and the vehicle needs immediate attention.
Common mistakes to avoid
Most drivers wait for a no-start event before replacing their battery, but warning signs like a slow engine crank and dim headlights often appear weeks earlier. Catching those signs early is the difference between a planned Saturday morning swap and a dead battery in a parking lot.
The three most common installation mistakes are reversed polarity (connecting negative before positive during installation), over-torquing terminal bolts, and skipping the hold-down bracket. Reversed polarity can blow fuses or damage the alternator. Over-torquing cracks the post. A loose battery vibrates itself to failure within months. None of these mistakes are hard to avoid when you follow the procedure in order.
A car battery lasts 3–5 years in moderate climates and only 2–3 years in hot regions like Texas. If your battery is approaching that window, a CCA load test at an auto parts store confirms whether it still holds adequate charge. Replace it proactively, not reactively.
Key Takeaways
Following the correct battery replacement steps, including disconnecting the negative terminal first, torquing bolts to 4–6 Nm, and driving 20 minutes post-installation, protects your vehicle and extends battery life.
| Point | Details |
|---|---|
| Disconnect negative first | Always remove the negative cable before the positive to prevent short circuits. |
| Match battery specs | Confirm BCI group size and CCA rating before purchasing a replacement battery. |
| Torque to spec | Tighten terminal bolts to 4–6 Nm only; over-torquing cracks soft lead posts. |
| Use a memory saver | Plug into the OBD-II port to preserve ECU values and avoid radio lockouts. |
| Drive after installation | A 20-minute drive lets the alternator charge the battery and update vehicle systems. |
What I’ve learned after watching hundreds of DIY battery swaps go sideways
Here’s the uncomfortable truth about battery replacement: the procedure itself is simple. What trips people up is confidence without preparation. I’ve seen car owners crack a brand-new battery post by over-torquing it with a half-inch drive ratchet, then wonder why the car still won’t start. I’ve seen others skip the hold-down bracket because it “seemed fine,” only to have the battery shift and arc against the hood latch three weeks later.
The memory saver is the step I push hardest. Most people skip it because they don’t own one and don’t want to buy a tool for a one-time job. But on a modern vehicle with a complex ECU, skipping it can mean a rough idle for a week, a locked radio, or a transmission that shifts strangely while the system relearns. A basic memory saver costs less than $20 and plugs straight into the OBD-II port. It’s worth every cent.
My honest advice: if your battery is older than three years and you live somewhere hot, don’t wait for it to fail. Get a load test done now. A battery that tests below 80% of its rated capacity is already on borrowed time. Replacing it on your schedule, with the right tools in your driveway, beats replacing it in a parking lot at 7:00 AM on a Monday. And if you’re ever unsure about what you’re looking at under the hood, a professional inspection through a car inspection checklist catches problems before they strand you.
— Hassan
Professional battery service at Expresslubearlington

Expresslubearlington is a RepairPal Certified Shop and CarFax Top-Rated Service Center serving drivers across the DFW area. The ASE-certified technicians at Expresslubearlington perform professional battery testing and battery replacement in Arlington with the right tools, correct torque specs, and a thorough post-installation check every time. If your battery is showing warning signs or you’d rather have a pro handle the swap, Expresslubearlington has you covered. Routine vehicle care, including battery service, is one of the smartest ways to protect your investment. Learn how regular car maintenance saves money over the long term and keep your vehicle running reliably for years ahead.
FAQ
What order do you disconnect battery terminals?
Always disconnect the negative terminal first, then the positive. Reconnect in reverse: positive first, negative last. This order prevents short circuits.
How long does a car battery replacement take?
A car battery replacement takes 25–40 minutes for most vehicles with basic hand tools and the correct replacement battery on hand.
Do I need a memory saver when replacing my battery?
A memory saver is strongly recommended for modern vehicles. Without one, your ECU adaptive values and radio presets may reset, causing rough idling or a locked radio.
What happens if I over-torque the battery terminal bolts?
Over-torquing cracks the soft lead terminal posts. The correct torque is 4–6 Nm (35–55 in-lb). Use a torque wrench rather than guessing by feel.
How often should a car battery be replaced?
Car batteries last 3–5 years in moderate climates and 2–3 years in hot regions. Replace proactively when a CCA load test shows capacity below 80% of the rated spec.