

Before you order parts or call a tow truck, do three things: check your battery’s resting voltage, look for corrosion on the cable terminals, and listen carefully to what your car is actually telling you. If your battery reads a healthy 12.6 V, your connections are clean and tight, and the car still won’t crank, a starter replacement is almost always the most reliable long-term fix. Piecemeal repairs can work in specific situations, but for most daily drivers, industry consensus favors full unit replacement because it addresses broad mechanical wear rather than just the symptom you found today.
Your three immediate checks:
- Battery resting voltage: A fully charged battery should read 12.6 V. Anything below 12.0 V at rest is suspect before you blame the starter.
- Rapid clicking vs. single click: Rapid clicking almost always points to a weak battery or a bad connection. One solid metallic click with bright interior lights is a stronger signal of a starter or solenoid problem.
- Visible corrosion: White or blue-green buildup on battery terminals creates resistance that mimics starter failure perfectly.
Table of Contents
- What are the most common signs of a failing starter?
- How do you rule out battery and connection problems at home?
- What will a professional shop test that you can’t easily do at home?
- Should you repair the starter or replace it entirely?
- How much does starter repair or replacement cost?
- What does the removal and installation process actually involve?
- What tools and parts do you need for starter work?
- What safety rules should you follow during diagnosis and repair?
- When should you take the car to a shop instead of doing it yourself?
- How Expresslubearlington handles starter diagnosis and repair
- Key Takeaways
- The diagnostic step most people skip
- Expresslubearlington is ready to diagnose your starter the right way
- Useful sources
- FAQ
What are the most common signs of a failing starter?
Not every no-start is a starter problem, but a few symptoms point there pretty directly. Knowing the difference saves you from swapping parts you don’t need.
- No crank, complete silence: You turn the key and nothing happens, but the lights and radio work fine. That combination points squarely at the starter circuit.
- Single metallic click: The solenoid fires but the motor doesn’t spin. Often caused by worn brushes or internal damage.
- Rapid clicking: The solenoid chatters because it can’t hold the circuit. This one usually traces back to a weak battery or a high-resistance connection, not the starter motor itself.
- Slow, labored cranking: The engine turns over, just barely. Could be battery, could be starter drawing too much current.
- Grinding noise: Damaged teeth on the starter’s drive pinion or the flywheel ring gear. Address this fast; ignoring it turns a starter job into a flywheel job.
- Starter stays engaged after startup: A whining or grinding sound after the engine fires means the solenoid is stuck. Shut the engine off immediately.
- Smoke or burning smell from the starter area: A serious electrical fault. Never a battery issue.
One symptom that catches a lot of people off guard is heat-soak failure. The car starts fine in the morning, but after a hot highway run and a 20-minute errand stop, it won’t crank. Let it cool for an hour and it starts again. That pattern points to thermal expansion or rising internal resistance inside the starter, not a wiring problem.
Pro Tip: If your car only fails to start when the engine is hot, replicate the failure deliberately. Drive it, let it heat-soak for 20–30 minutes, then try to start it. That hot-soak test is the only reliable way to catch this failure mode before it strands you.
How do you rule out battery and connection problems at home?
This is where most people skip ahead and pay for it. Misdiagnosis is the most expensive mistake in starter troubleshooting, and most of it happens because someone skipped the battery and connection checks. Let’s fix that.
Safety first: Park on level ground, set the parking brake, and keep the negative battery terminal disconnected whenever you’re working on starter wiring. Review safe battery handling steps before you start if you’re new to this.
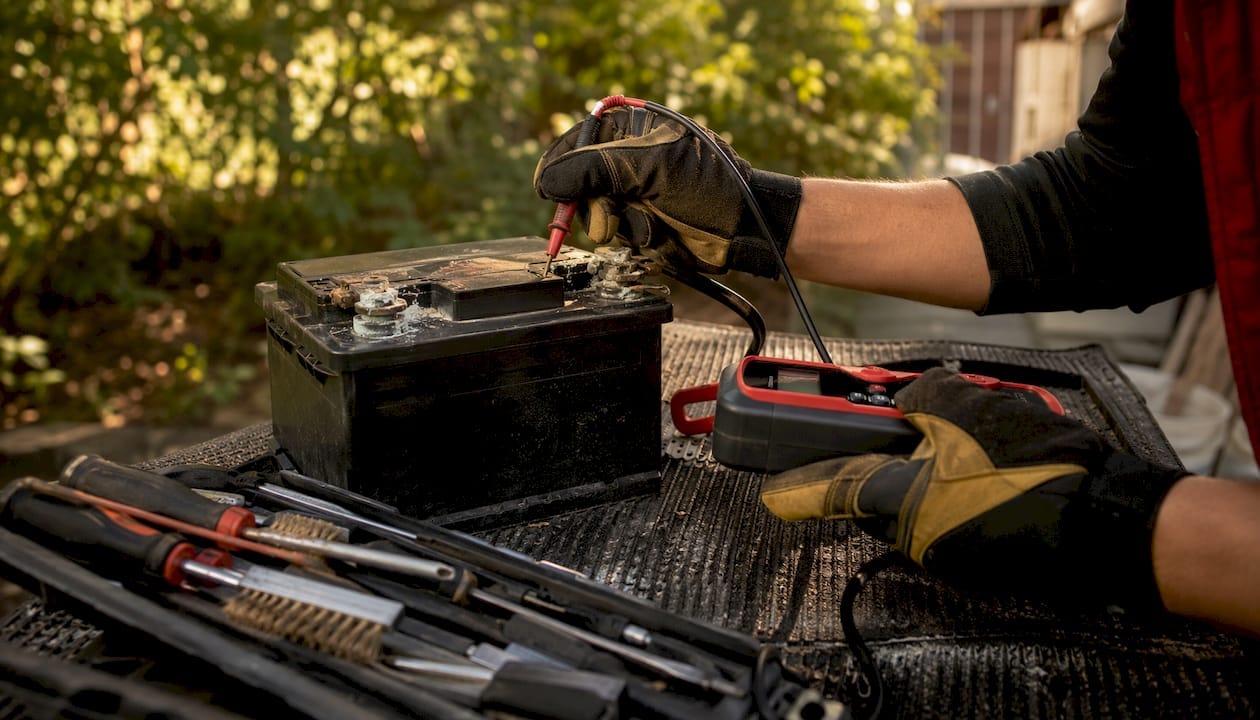
- Check resting battery voltage. Set your multimeter to DC voltage. With the engine off and no accessories running, touch the probes to the battery terminals. A healthy battery reads 12.6 V. A reading below 9.6 V under load is a clear sign the battery can’t support the starter.
- Inspect terminals and cables. Look for corrosion, loose clamps, and cracked insulation. Wiggle the cables at both ends. A connection that moves is a connection that fails.
- Try a jump-start. If the car starts immediately with a jump, the battery is the likely culprit, not the starter. If it still won’t crank with a known-good jump source, the starter circuit is the next suspect.
- Voltage-drop test (positive side). With the engine cranking, place one multimeter probe on the positive battery terminal and the other on the starter’s positive input post. A healthy circuit shows less than 0.5 V of drop. More than that means resistance is robbing the starter of power.
- Voltage-drop test (ground side). Repeat the test between the negative battery terminal and the starter’s ground point. Same threshold: under 0.5 V. High resistance here is just as crippling as on the positive side.
- Check solenoid trigger voltage. With a helper turning the key, probe the small trigger wire on the solenoid. You should see battery voltage there when the key is in the start position. Trigger voltage present but no crank? The starter itself has failed internally.
Quick troubleshooting flow: Battery voltage OK → Voltage-drop OK → Trigger voltage present → No crank = internal starter failure. That sequence rules out every common false positive before you pull the starter.
Tools to have ready: digital multimeter, battery load tester or clamp ammeter, jumper cables or a jump-start pack, and a flashlight.
What will a professional shop test that you can’t easily do at home?
Home checks get you most of the way there, but a shop has tools that close the loop definitively.
- Current-draw test. A clamp ammeter around the battery cable measures exactly how many amps the starter pulls during cranking. A starter drawing far more than its rated amperage is working too hard, usually because of internal wear or a dragging armature. One drawing far less may have an open circuit inside.
- Bench test. Once the starter is removed, a bench test applies direct battery voltage to the motor and solenoid in a controlled setting. This isolates armature condition, brush contact, solenoid engagement, and pinion throw. It tells you whether the vehicle-side wiring is innocent, which prevents unnecessary wiring repairs.
- Voltage-drop test under load. The shop repeats the positive and ground voltage-drop checks with a proper load tester, which pulls realistic cranking current and exposes marginal connections that look fine at rest.
- Control-circuit verification. The technician checks the starter relay, the neutral safety switch (or clutch interlock on manual transmissions), and the ignition switch output. A failed interlock switch is a surprisingly common cause of a no-crank that looks exactly like a dead starter.
Shops prefer full replacement over rebuilds in most daily-driver cases for a straightforward reason: a bench test can confirm the motor is bad, but it can’t always reveal every layer of hidden wear. Replacement transfers that uncertainty into the warranty rather than leaving it in your engine bay.
Pro Tip: Ask the shop to record a short video of the bench test or provide the current-draw reading in writing. A trustworthy shop won’t hesitate. That number is your proof before you approve parts.
Should you repair the starter or replace it entirely?
The short answer: replacement wins for most daily drivers. Here’s how to think through the exceptions.
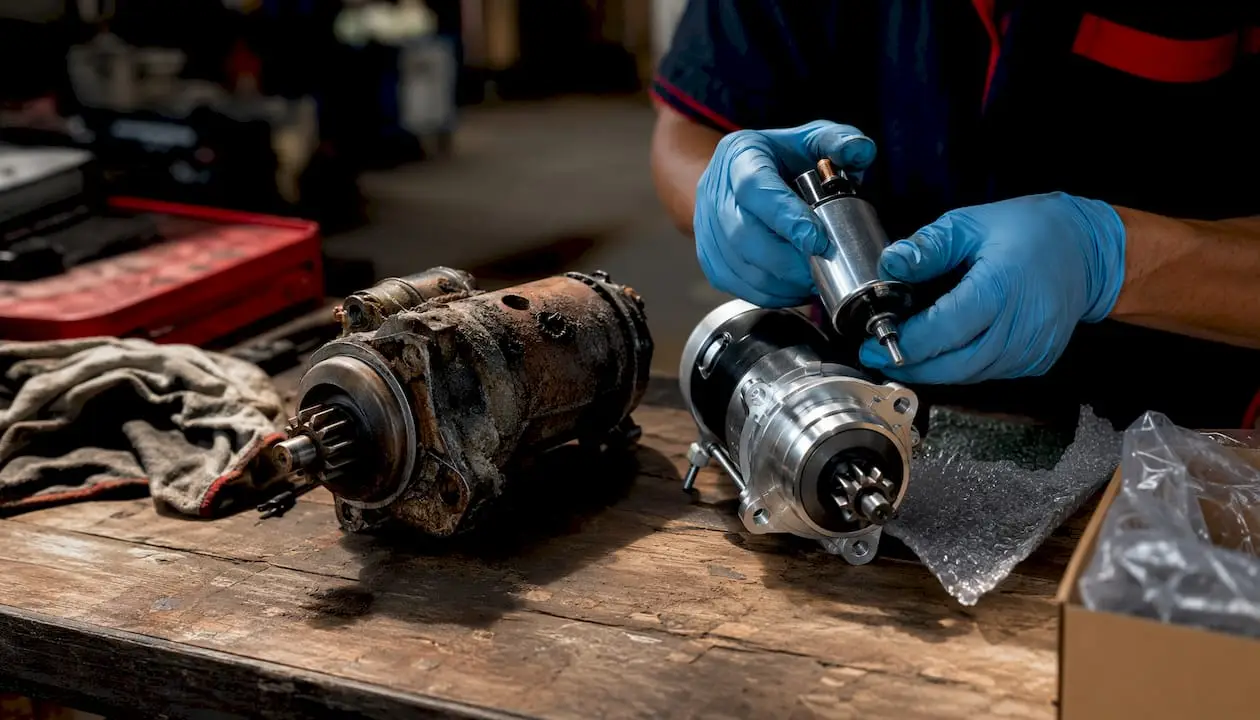
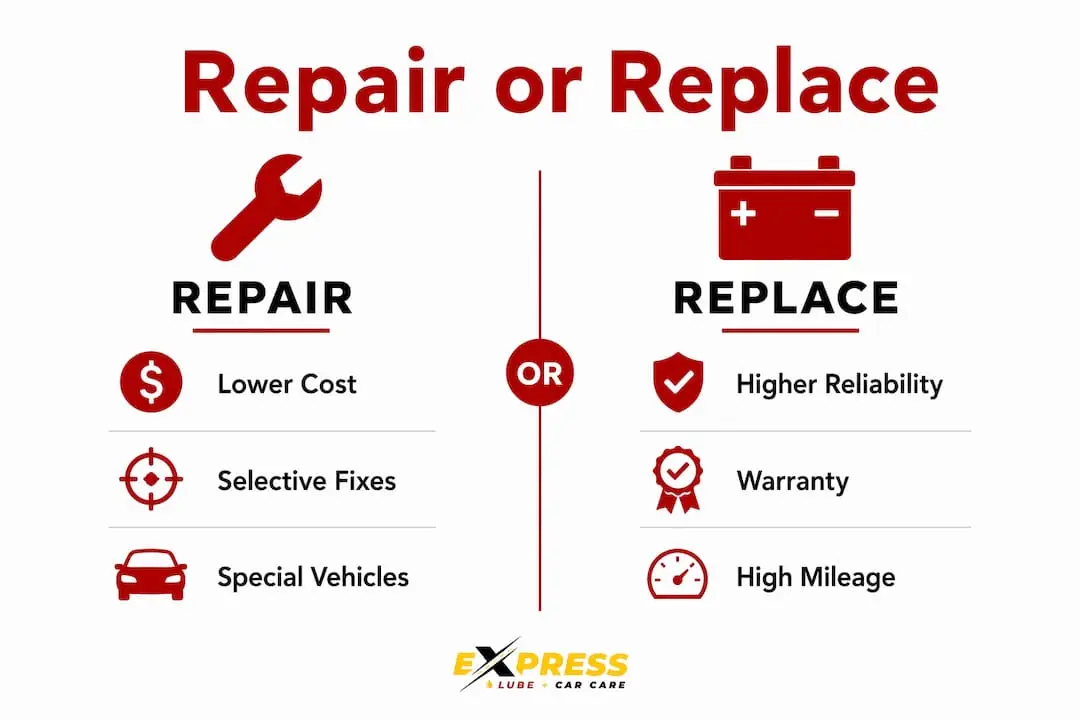
Repair means replacing individual components: brushes, solenoid contacts, bushings, or the solenoid itself. It makes sense when the failure is clearly isolated, the unit is clean and dry, and the labor to remove the starter is minimal. Classic car owners and fleet managers with specialty applications often go this route because sourcing an exact replacement is harder.
Replacement means installing a new, new-aftermarket, or remanufactured unit. It makes sense when the starter has high mileage, shows oil or coolant contamination, has internal mechanical damage, or when labor access is difficult enough that you only want to do the job once. Oil contamination makes rebuilding a false economy because it destroys newly fitted electrical components quickly. See our deeper breakdown on repair vs. replace decision criteria if you want to work through the numbers for your specific vehicle.
| Factor | Repair | Replace |
|---|---|---|
| Best for | Isolated, clean failure; classic/specialty vehicles | High-mileage, contaminated, or broadly worn units |
| Parts cost | — | $100–$600+ depending on OEM vs. reman vs. aftermarket |
| Labor risk | Low if access is easy; high if buried | Same labor, but you only do it once |
| Warranty | Varies; often limited to the replaced part | New or reman units typically carry 1–3 year warranties |
| Long-term reliability | Good if failure was truly isolated | More predictable; addresses broader wear |
How much does starter repair or replacement cost?
Total professional replacement typically runs $350–$1,100, depending on your vehicle, the part you choose, and how long the job takes. Parts alone range from under $80 for a basic aftermarket unit to over $400 for an OEM starter on a luxury or European vehicle.
| Cost Driver | Low End | High End |
|---|---|---|
| Parts (aftermarket/reman) | ~$80–$150 | ~$250–$400+ (OEM) |
| Total professional job | ~$350 | ~$1,100+ |
Labor is the biggest variable. An easy-access starter on a four-cylinder sedan might take an experienced tech 1–2 hours. A starter buried under an intake manifold or near an engine mount on a transverse V6 can stretch to 3–6 hours or more, and that labor time is what drives estimates into the four-figure range.
Sanity-check your quote:
- Ask for the labor hours estimate separately from parts.
- Confirm the part brand and whether it’s new, remanufactured, or aftermarket.
- Ask what the warranty covers and for how long.
- If the estimate seems high, ask whether any additional repairs (wiring, flywheel inspection) are included and why.
What does the removal and installation process actually involve?
Here’s the honest scope of the job, without pretending it’s the same on every vehicle.
- Disconnect the negative battery terminal. Non-negotiable first step.
- Lift and support the vehicle if the starter is accessed from underneath. Use rated jack stands, not just a floor jack.
- Disconnect the wiring harness. Label or photograph every connector and cable before you remove anything.
- Unbolt the starter. Usually two or three bolts, but torque specs vary by application. Consult your factory service manual.
- Compare part numbers. Hold the old and new units side by side. Confirm the mounting pattern, nose housing, and solenoid connector match before you install anything.
- Install the new unit and torque to spec. Under-torqued bolts vibrate loose; over-torqued bolts strip threads in aluminum housings.
- Reconnect wiring, reconnect the battery, and test.
Common complications that turn a two-hour job into an all-day one:
- Intake manifold removal required for access
- Starter located behind or below engine mounts
- Seized fasteners on older vehicles (penetrating oil the night before helps)
- Corroded electrical connectors that crumble when disturbed
- Flywheel damage discovered after removal that requires additional repair
A note on vehicle-specific instructions: this overview is intentionally general. Always pull the factory repair manual or an OEM repair database for your exact year, make, and model before you start. Torque specs and wiring routing are not universal, and getting them wrong can cause collateral damage that costs more than the starter itself. Knowing when a job is beyond your comfort zone is part of avoiding costly engine repairs down the road.
What tools and parts do you need for starter work?
Essential tools:
- Digital multimeter (for voltage and voltage-drop checks)
- Battery load tester or clamp ammeter
- Socket set with extensions (metric and standard)
- Breaker bar for stubborn fasteners
- Torque wrench
- Floor jack and rated jack stands
- Penetrating oil (apply to fasteners 12–24 hours ahead when possible)
- Flashlight or work light
Part options:
- New OEM: Best fit and quality, highest price ($250–$600+). Ideal when the vehicle is newer or when you plan to keep it long-term.
- New aftermarket: Good value for most applications ($120–$350). Quality varies by brand; stick with names that carry a clear warranty.
- Remanufactured: A solid middle ground ($100–$250) when sourced from a reputable supplier with a warranty. Avoid no-name units with no return policy.
Consumables worth replacing while you’re in there:
- Battery terminal ends (if corroded or damaged)
- Ground strap (if brittle or corroded)
- Mounting fasteners (replace if corroded or stretched)
- Threadlocker on mounting bolts per the service manual
Always cross-check the new starter’s part number against the removed unit before installation. A wrong-fit starter that almost bolts in is one of the more frustrating mistakes in this job.
What safety rules should you follow during diagnosis and repair?
A few of these are obvious. A few aren’t, and the non-obvious ones are where people get hurt or create expensive new problems.
Battery safety: Disconnect the negative terminal first, reconnect it last. Never let a wrench bridge the positive terminal to any grounded metal. A short circuit at the battery can deliver enough current to weld the tool to the car, start a fire, or cause the battery to vent explosive hydrogen gas.
Vehicle support: A floor jack is for lifting. Jack stands are for supporting. Never work under a vehicle held only by a hydraulic jack. Chock the wheels on the opposite end of the car before you lift anything.
Electrical shortcuts to avoid: Don’t jump battery voltage directly across the starter’s main posts unless you know exactly what you’re doing and the vehicle is in neutral with the wheels chocked. The starter will spin the engine immediately.
Common mistakes that cost people money:
- Skipping voltage-drop testing and ordering a starter that wasn’t the problem
- Failing to replace an oil-saturated starter (contamination will destroy the new brushes quickly)
- Under-torquing mounting bolts, which causes vibration damage and noise
- Reusing cracked or heat-damaged wiring connectors
Pro Tip: Before you disconnect a single wire, take photos of the wiring from multiple angles. Starter wiring is simple, but a misrouted cable that contacts the exhaust or a spinning component can cause a fire or a short. Thirty seconds of photos saves an hour of head-scratching on reinstallation.
Reviewing common repair mistakes before you start is worth the five minutes.
When should you take the car to a shop instead of doing it yourself?
Some starter jobs are genuinely DIY-friendly. Others will humble even experienced home mechanics. Here’s how to read the line.
Go to a shop when:
- The failure is intermittent or only happens when the engine is hot (heat-soak diagnosis requires replicating the failure, which is hard to do at home)
- The starter is oil-saturated from a leak (the leak needs to be fixed first, or the new starter won’t last)
- The starter is buried under the intake manifold, near engine mounts, or otherwise requires major disassembly
- You don’t have a multimeter or load tester and can’t confirm the battery and connections are healthy
- The car has already had one starter replaced recently and is failing again
What a trustworthy shop will deliver:
- Systematic voltage-drop and current-draw testing before recommending any parts
- A bench test on the removed starter to confirm internal failure
- Clear part options with pricing for OEM, remanufactured, and aftermarket
- A written warranty on parts and labor
- Honest answers when you ask about labor hours and what the warranty covers
Ask specifically whether the shop records test results. A shop that hands you a current-draw reading and a bench-test result is showing its work. That transparency is a strong signal of the kind of trusted mechanic relationship worth having. If a shop offers a 24-month/24,000-mile warranty on the repair, that’s the standard to hold them to.
How Expresslubearlington handles starter diagnosis and repair
At Expresslubearlington (Express Lube & Car Care in Arlington, TX), starter jobs follow a documented workflow that eliminates guesswork at every step.
The diagnostic and repair process:
- Vehicle intake and symptom capture: The technician records exactly what the vehicle is doing, when it happens, and under what conditions. Hot-soak symptoms get noted specifically.
- Battery and voltage-drop testing: Resting voltage, load test, and both positive and ground voltage-drop checks under cranking load.
- Current-draw and bench testing: Clamp ammeter during cranking, followed by a bench test on the removed starter to isolate internal failure from vehicle-side wiring issues.
- Documented recommendation: Repair or replace, with the test data to back it up and clear pricing for each part option.
- Parts selection and installation: OEM or quality remanufactured units, torqued to spec, with wiring inspected and replaced if damaged.
- Post-install verification and digital vehicle inspection: Confirm the repair before the car leaves the bay.
Expresslubearlington is an ASE-certified shop, a RepairPal Certified Shop, and a Carfax Top-Rated Service Center. Those aren’t just badges. They represent a commitment to documented, repeatable diagnostic work and the kind of accountability that comes with a written warranty. Every qualifying repair is backed by a 24-month/24,000-mile warranty, which means if the starter fails within that window, you’re covered.
Key Takeaways
For most daily drivers, a full starter replacement after confirmed diagnosis is the most reliable and cost-effective fix available.
| Point | Details |
|---|---|
| Check battery and connections first | Voltage-drop and load tests rule out the most common false positives before you touch the starter. |
| Replacement beats repair for daily drivers | Industry practice favors full replacement because it addresses broad wear and provides predictable reliability. |
| Total cost range | Professional starter replacement typically runs $350–$1,100 total. |
| Labor access drives cost | Easy-access jobs take 1–2 hours; starters buried under intake manifolds can require 3–6+ hours of labor. |
| Expresslubearlington’s approach | ASE-certified technicians run voltage-drop, current-draw, and bench tests before recommending parts, backed by a 24-month/24,000-mile warranty. |
The diagnostic step most people skip
Here’s the thing about starter problems: the starter is almost never the first place to look, but it’s almost always the first part people replace. That gap between where the problem actually is and where people assume it is costs drivers real money every day.
The voltage-drop test is the single most skipped step in car starter troubleshooting. It takes about five minutes with a multimeter, and it will tell you whether a high-resistance connection is the real culprit before you pull the starter. A corroded ground strap or a loose cable end can produce every symptom of a dead starter motor. Replace the starter without finding that connection, and you’ll be back in the same spot within a year, wondering why the “new” starter is already failing.
The other thing worth saying plainly: heat-soak failures are genuinely tricky. A starter that works fine in the morning and fails after a hot soak isn’t going to show up on a cold bench test. If your shop isn’t asking about when the failure happens and under what conditions, they’re not getting the full picture. Bring notes. Write down the temperature, how long the engine had been running, and how long it sat before the no-start. That information is worth more than most people realize.
Proper diagnosis isn’t pessimism. It’s the thing that keeps a $150 connection repair from turning into a $900 parts swap.
Expresslubearlington is ready to diagnose your starter the right way
Starter problems don’t fix themselves, and guessing costs more than testing. At Expresslubearlington, our ASE-certified technicians run the full diagnostic sequence: voltage-drop testing on both the positive and ground circuits, a current-draw test under cranking load, and a bench test on the removed starter to confirm exactly what failed. You get clear options, OEM or quality remanufactured parts, and a straight answer before any work begins.

Every qualifying repair is backed by our 24-month/24,000-mile warranty, so you’re not gambling on a fix that might not hold. If you’ve already done some home checks, bring your notes. We’ll pick up right where you left off. And if the estimate gives you pause, auto repair financing is available to keep your car on the road without the upfront pressure. Stop by our Arlington, TX location or book your diagnostic appointment today.
Useful sources
- AAA Automotive: How Much Does a Starter Replacement Cost? — Cost ranges, labor time estimates, and professional diagnostic guidance.
- Rick’s Free Auto Repair Advice: Bad Starter or Battery? — Practical voltage-drop test protocol and diagnostic decision flow.
- HELLA TechWorld: Checking the Starter — Technical breakdown of starter failure modes including heat-soak and brush wear.
- CarParts Blog: Starter Replacement Cost — Industry guidance on repair vs. replacement and contamination risks.
- AutoZone: Starter Replacement Cost — DIY cost context and parts pricing for common applications.
For vehicle-specific torque specs, wiring diagrams, and routing instructions, always consult your factory service manual or an OEM repair database. Bring any test results or notes from home checks to your shop appointment.
FAQ
How much does it cost to fix a starter?
Professional starter replacement typically costs $350–$1,100 total, with parts ranging from under $80 to over $400 depending on the vehicle and part type. Labor access is the biggest cost driver.
Can you repair a starter yourself?
Yes, if you have a multimeter, basic hand tools, and confirmed that the battery and connections are healthy first. Misdiagnosis — replacing the starter when a bad cable is the real problem — is the most common and expensive DIY mistake.
Is it worth fixing a starter, or should you just replace it?
For most daily drivers, full replacement is the better value because it addresses broad internal wear and comes with a warranty. Repair makes sense only when the failure is clearly isolated and the unit is clean, dry, and easy to access.
How do you tell if a starter is actually bad?
A single metallic click with bright interior lights, a no-crank with normal electrical function, or a grinding noise during startup all point to the starter. Confirm it by running a voltage-drop test and checking for solenoid trigger voltage — if trigger voltage is present but the engine won’t crank, the starter has failed internally.